Creating OPEX XML from Spreadsheets
28 Jan 2023This is a brief user guide for creating OPEX XML documents using the 3rd party Spreadsheet Converter.
This website allows you to upload a spreadsheet containing descriptive metadata and generate XML documents compatible with Preservica.
Background
The spreadsheet converter makes a few simple assumptions about how data is stored in the spreadsheet. It assumes that each row of the spreadsheet contains descriptive metadata for a single Preservica Asset. For example one row corresponds to the metadata for a single document or image etc.
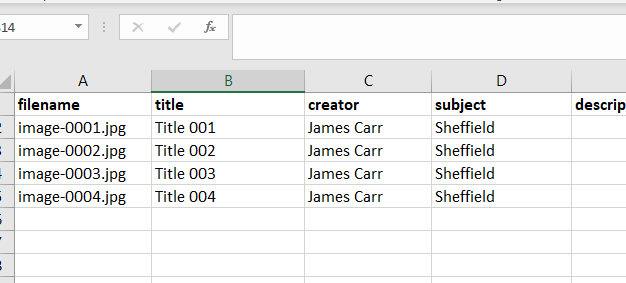
Your spreadsheet should contain a header row, the column names in the header will become the metadata attributes within the exported XML documents.
For example, for Dublin Core metadata you may have a spreadsheet similar to:
You may also have a column which contains the name of the digital object to which the metadata refers such as filename etc. The name of this column is not important. If you dont have a special column such as filename etc then one of the other column names must contain some unique information.
The spreadsheet column names can also contain prefixes, these can be used to add additional XML namespaces into the XML documents. The prefixes are seperated by “:” from XML attribute names.
Prefixes can be useful for XML schema’s such as Dublin Core where the XML attributes live inside a different namespace to the main XML root element.
The metadata is added to the rows under the column headings
and the spreadsheet should be exported to UTF-8 CSV.
You are now ready to upload the metadata.
Namespaces
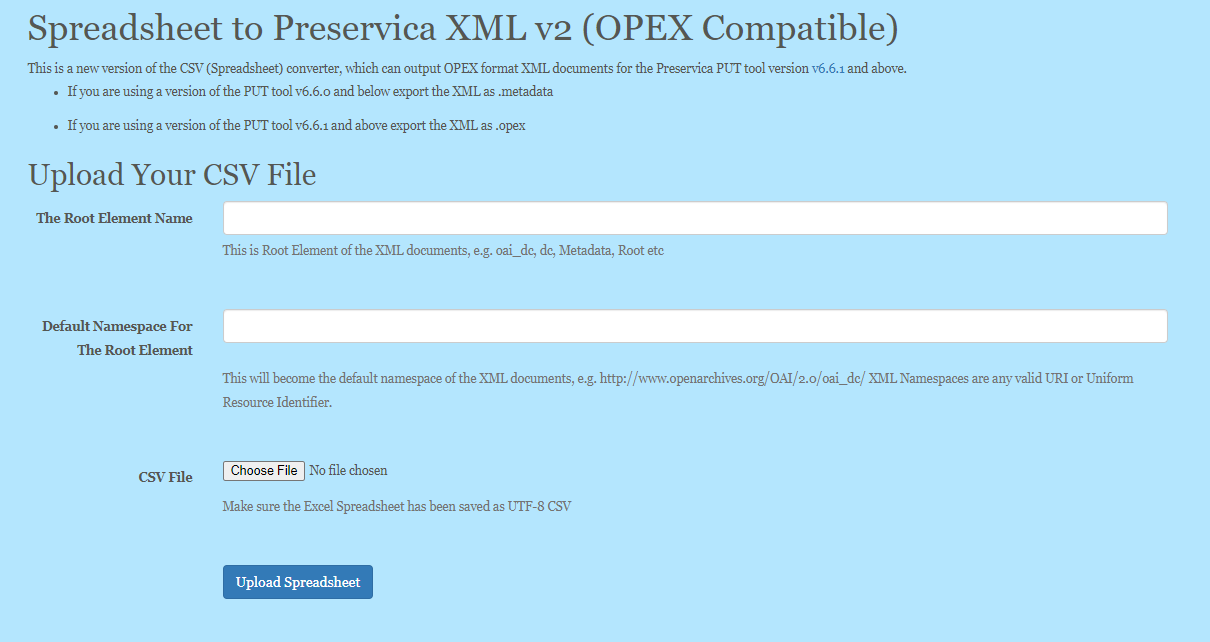
The first field to enter on the website askes for a Root Element name
This field controls the name of the XML metadata root element. This is the element that all the spreadsheet column names are children of.
For example, to create OAI-DC type metadata such as:
<?xml version="1.0" encoding="UTF-8"?>
<oai_dc:dc  xmlns:oai_dc="http://www.openarchives.org/OAI/2.0/oai_dc/">
	<oai_dc:title>Title 001</oai_dc:title>
	<oai_dc:creator>James Carr</oai_dc:creator>
	<oai_dc:subject>Sheffield</oai_dc:subject>
	<oai_dc:description/>
	<oai_dc:publisher/>
	<oai_dc:contributor/>
	<oai_dc:date/>
	<oai_dc:type/>
	<oai_dc:format/>
	<oai_dc:identifier/>
	<oai_dc:source/>
	<oai_dc:language/>
	<oai_dc:rights/>
</oai_dc:dc>
The root element name is dc and the root element namespace is http://www.openarchives.org/OAI/2.0/oai_dc/
By default all the element names are within the root element namespace.
In this case the root element namespace and the Dublin Core elements should be in different namespaces, (15 term Dublin Core elements actually live inside the “http://purl.org/dc/elements/1.1/” namespace) so this is a good example of where we add a prefix to the column names, this allows us to associate additional namespaces to the elements.
Formatting the Output
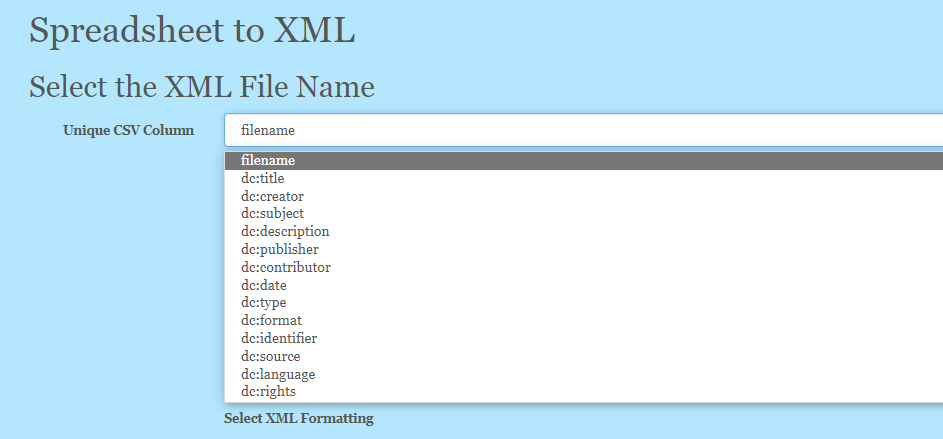
After the CSV has been uploaded you need to select which column should be used to name the XML documents. This should be a column containing either the filename or other unique information
Naming Convention
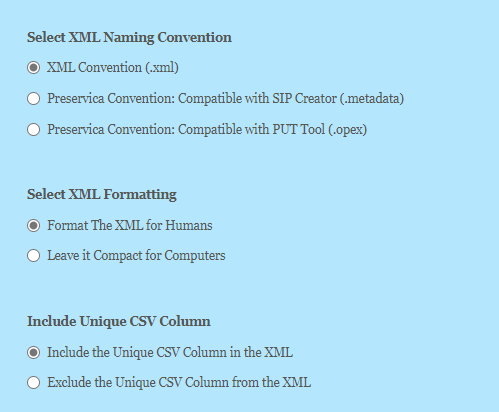
This is where you can decide on what type of metadata you would like to export.
The first two options (.xml and .metatadata) create simple XML documents which would look like:
<?xml version="1.0" encoding="UTF-8"?>
<dc xmlns="http://www.openarchives.org/OAI/2.0/oai_dc/" xmlns:dc="http://purl.org/dc/elements/1.1/">
	<filename>image-0001.jpg</filename>
	<dc:title>Title 001</dc:title>
	<dc:creator>James Carr</dc:creator>
	<dc:subject>Sheffield</dc:subject>
	<dc:description/>
	<dc:publisher/>
	<dc:contributor/>
	<dc:date/>
	<dc:type/>
	<dc:format/>
	<dc:identifier/>
	<dc:source/>
	<dc:language/>
	<dc:rights/>
</dc>
The only difference being the file extension. The 3rd option wraps the XML in a OPEX header element ready for upload through the PUT tool.
<?xml version="1.0" encoding="UTF-8"?>
<opex:OPEXMetadata xmlns:dc="http://purl.org/dc/elements/1.1/" xmlns:oai_dc="http://www.openarchives.org/OAI/2.0/oai_dc/" xmlns:opex="http://www.openpreservationexchange.org/opex/v1.2">
	<opex:DescriptiveMetadata>
		<oai_dc:dc>
			<dc:title>Title 001</dc:title>
			<dc:creator>James Carr</dc:creator>
			<dc:subject>Sheffield</dc:subject>
			<dc:description/>
			<dc:publisher/>
			<dc:contributor/>
			<dc:date/>
			<dc:type/>
			<dc:format/>
			<dc:identifier/>
			<dc:source/>
			<dc:language/>
			<dc:rights/>
		</oai_dc:dc>
	</opex:DescriptiveMetadata>
</opex:OPEXMetadata>
XML Formatting
This option allows you to format the XML to improve its readability by adding new lines and indenting elements.
Unique CSV Column
This option allows you to remove the additional column you may have added to store the object filename that should not be part of the XML. For example if you added a filename column in the spreadsheet.
Additional Namespaces
This field allows you to specify any additional namespaces which may be needed. For example every column prefix will need an additional namespace.
Download
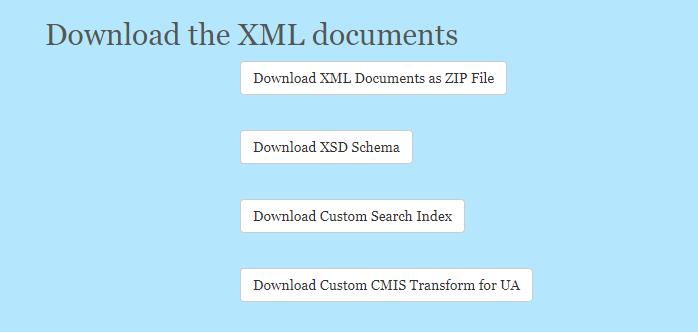
Once the XML has been created, you are shown 4 download buttons.
The first button downloads a ZIP file containing a metadata document for each row in the spreadsheet. The name of the XML document is taken from the column used to identify the row.
The other buttons allow you to downloads an XSD schema for your metadata template, a template to allow you to custom the search index and a basic CMIS transform to allow the metadata to be displayed in UA.
